For most home cooks, the honest answer is this: start with specialty dry-aging bags if you want simplicity, or commit to a converted mini-fridge if you want control and don't mind tinkering. Meat processor Milo Locker Meats describes these as the two categories home dry-aging generally falls into, and each comes with a very different balance of cost, space, effort, and risk. What matters most—more than any piece of equipment—is holding a steady temperature between 34°F and 36°F and keeping air moving around the meat. Get those two things right and almost any method can work; get them wrong and no bag or gadget will save the cut.
Introduction to Home Dry-Aging Methods
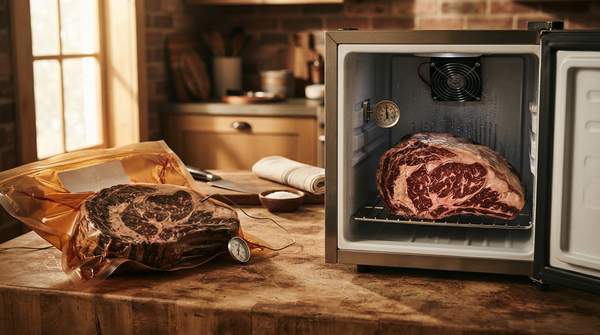
Dry-aging concentrates the natural proteins and fats in beef, producing what Milo Locker Meats calls a dense, rich, and bold flavor profile. The process is simple in principle—hold a large subprimal cut, like a whole ribeye or strip loin, in cold, moving air for weeks—but the equipment choices branch quickly. One route uses semi-permeable membrane bags that let moisture escape while blocking oxygen, sitting on a wire rack in a refrigerator you already own. The other route converts a mini-fridge or beverage cooler into a dedicated aging chamber with aftermarket fans, humidifiers, and temperature controllers to mimic commercial environments.
At the premium end, purpose-built commercial dry-aging cabinets automate all of these controls at once, though this comparison focuses on the two build-it-yourself-scale methods. This guide covers beef and bison; other meats may behave differently, and all cost figures exclude the meat itself.
Essential Environmental Controls for Safe Dry-Aging
Temperature is the non-negotiable variable. According to Milo Locker Meats, safe dry-aging requires the temperature to be kept strictly between 34°F and 36°F—outside that band, you invite what they bluntly label the bacterial threat. That requirement is exactly why a standard domestic refrigerator, opened several times a day for milk and leftovers, is generally unsuitable: frequent door openings and inaccurate thermostats push the environment into unsafe ranges and can contaminate the meat with odors from other foods. A dedicated unit solves both problems at once.
Airflow is the second pillar. Meat cook and writer Jess Pryles emphasizes that wire shelves, rather than solid glass, are needed "to make sure airflow is sufficient," and notes that a fridge that is too large for one or two pieces can struggle with humidity levels. Her practical touches are worth borrowing for any setup: choose a unit sized to the amount you age, and consider a door that lets you check progress without opening it, since every look costs you temperature stability.
Specialty Dry-Aging Bags: Simplicity and Accessibility
Bags are the lowest-effort entry into dry-aging. The method, as Milo Locker Meats explains, is to place a large subprimal cut inside a semi-permeable membrane bag designed to let moisture escape while keeping oxygen out, vacuum seal it, and rest it on a wire rack in your refrigerator. There is no wiring, no controller calibration, and no separate appliance eating floor space.
The trade-offs are real, though. The bag cost is additional to the meat and the refrigeration you already have, so the "cheap" entry point assumes a suitable fridge exists. Careful sealing matters—a poor seal undermines the membrane's whole job—and even a correctly sealed bag can spoil if the refrigerator around it runs warm or unstable. Milo Locker Meats still recommends a dedicated, clean refrigerator for best results, which quietly pushes the true bag-method cost upward if you don't have one. The payoff is accessibility: this is the method a first-timer can realistically execute this weekend.
DIY Converted Mini-Fridges: Customization and Control
The DIY route turns any dedicated fridge into an aging chamber, and it can be genuinely cheap. An Instructables build documented a working dry-aging fridge for under $80: a used mini-fridge, a pair of 12V PC cooling fans with a power supply, a thermometer with a remote sensor on a wire, a wire rack, and optionally a temperature-controlled plug, a bowl of water, and insulation. The author's only firm requirement on the fridge itself is that it be dedicated to the project and cleaned with soap and water beforehand.
But cheap hardware buys you a monitoring obligation. You are installing and calibrating fans, controllers, and sensors, then watching them for the duration of the aging run. Milo Locker Meats is candid about the ceiling here: while these builds are fun experiments, they carry substantial risks and physical limitations that make results highly inconsistent compared with commercial environments. If the thermostat is inaccurate or the door gets opened, the temperature drifts out of the safe band without announcing itself—which is exactly why a remote-sensor thermometer that reads without opening the door earns its place in the parts list.
Home Dry-Aging Methods: A Comparative Overview
Set side by side, the two methods split cleanly on cost, space, effort, and risk. Bags win on ease; a converted mini-fridge wins on control and repeatability once you get it dialed in. The table below brings the comparison into one view—costs are initial setup only, meat excluded.
| Method | Estimated Initial Cost | Space & Equipment | Ease of Use / Effort | Key Safety Risks |
|---|---|---|---|---|
| Specialty dry-aging bags | Low entry cost; bag price only, on top of a refrigerator you already have | Fits an existing fridge; a dedicated, clean unit recommended for best results | Easiest path: seal a subprimal, rest it on a wire rack; minimal setup | Lower risk than open-air methods, but improper sealing or an unstable fridge can still cause spoilage |
| DIY converted mini-fridge | Can run under $80: used fridge plus fans, power supply, thermometer, optional controller and insulation; varies with parts | A dedicated appliance occupying floor space, plus aftermarket fans, controllers, and a wire rack | Significant setup, calibration, and ongoing monitoring; needs technical aptitude | Substantial and inconsistent: inaccurate thermostats and door openings can push temps outside the safe 34–36°F band |
Where does that leave commercial dry-aging cabinets? They are the premium third option—purpose-built enclosures that automate the temperature, humidity, and airflow that DIY builders approximate with parts. Their specific prices fall outside what the evidence here supports, so treat them as the aspirational tier: the endpoint of the same control principles, packaged and made consistent.
Making Your Dry-Aging Choice
Home cooks should select a dry-aging method based on their budget, technical comfort, and willingness to manage safety risks, prioritizing specialty bags for simplicity or a dedicated, controlled mini-fridge for more customization. If you're aging one ribeye and want to see what the fuss is about, bags in a reliable, clean fridge are the sane first step. If you expect to age repeatedly and enjoy tuning hardware, the sub-$80 mini-fridge route gives you a reusable chamber—provided you accept the monitoring burden and the inconsistency risk that comes with non-commercial environments.
Whichever you pick, verify success with the indicator Milo Locker Meats sets as the standard: the chosen method consistently maintains a temperature between 34–38°F (1–3°C) and ensures adequate air circulation, with a remote-sensor thermometer so you can confirm it without opening the door. Hit that band for the full aging period and you've given the meat its best shot at the concentrated, bold flavor that makes the effort worth it.
Sources
- DIY Dry-Aging vs. Craft Butcher Dry-Aging: The Risks, Realities, and Science — Milolockermeats
- Super Simple, Tried and Tested, <$80, Meat Dry Aging Fridge — Instructables