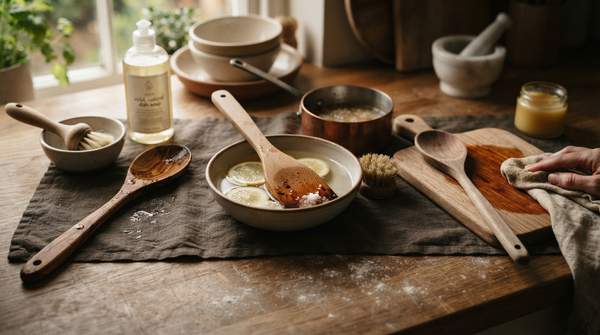
Wooden spoons, spatulas, and boards are porous, and that porosity is both their charm and their weakness: they absorb water, odors, and oils in ways stainless steel never will. The good news is that caring for them is not complicated. Cleaning experts and utensil makers broadly agree on a three-tier approach: a quick hand-wash after every use, a periodic deep clean when stains or smells set in, and a full restoration—sanding plus conditioning—when the wood turns dry, rough, or cracked. This guide covers plain, unfinished wooden utensils only; lacquered, painted, or decorative pieces are outside its scope, as are commercial cleaning processes.
Decision Framework for Wooden Utensil Care
Before you reach for a sponge or sandpaper, diagnose the utensil. Look at its appearance, feel its texture, and give it a sniff. The matrix below maps each condition to the right level of care, so you never do more—or less—than the wood needs.
| Condition | What You'll Notice | Recommended Action |
|---|---|---|
| Just used | Food residue, no lasting changes | Hand-wash in warm soapy water, dry thoroughly |
| Stained or odorous | Absorbed stains or lingering food smells | Deep clean to extract embedded residue, then recondition |
| Rough or fuzzy | Surface feels raised or fibrous after washing | Light sanding with fine-grit paper, then a fresh coat of oil |
| Dry or dull | Wood fibers look or feel dry to the touch | Condition with food-safe oil or board cream |
| Minor cracks | Small splits, no splintering | Food-safe wood glue, gentle sanding, recondition |
| Severe cracks or splinters | Deep splits or broken fibers | Replace the utensil |
The key distinction is severity. Wirecutter's guidance is blunt on the endpoint: a cracked or severely splintered spoon should be tossed, because it risks bacterial contamination that no cleaning can fix. Everything short of that is salvageable.
Daily Care: Simple Steps for Everyday Hygiene
Routine cleaning is where most of a utensil's lifespan is won or lost. The rules are consistent across sources: wash by hand in hot, soapy water, never use the dishwasher, never let wood soak, and dry it completely before putting it away.
Robin Murphy, a cleaning expert and chief cleaning officer at Maid Brigade, recommends warm water, dish soap, and a sponge or soft brush. "Wash them after use, rinse well, and dry them with a clean towel," she told NBC News. "Let them air-dry completely before putting them away." Wirecutter adds a practical refinement: scrub visible food particles under hot running water, pat dry with a clean towel, then let the utensil air-dry for at least a few hours—preferably overnight—before any conditioning step.
Two habits matter as much as the wash itself. Because wood absorbs odors that can transfer to food, Wirecutter advises avoiding fragranced soaps. And Earlywood, a wooden-utensil maker, sums up its entire care philosophy in five rules: hand-wash in hot soapy water, use the scratchy side of the sponge, skip the dishwasher, never soak, and oil liberally when the wood starts to look dry.
Deep Cleaning for Stains and Odors
Daily washing cleans the surface, but wood's open grain traps food particles, oils, and odors below it. When a spoon smells of last week's curry or carries a stain that scrubbing won't lift, it's time for a deeper treatment.
For mold, the guidance from care guides is specific: use undiluted white vinegar with at least 5% acidity, then dry the utensil thoroughly. For general absorbed residue and odor, boiling is one extraction method—but it comes with a firm limit. Keep it to ten minutes maximum, and only for plain, unfinished wood; longer exposure risks splitting the grain. Treat boiling as an occasional intervention, not a routine step.
After any deep clean, the wood will be stripped of its protective oils along with the grime. That's the moment to recondition: once the utensil has dried completely, work in food-grade mineral oil or board cream and let it absorb fully. Skipping this step leaves the wood more vulnerable than before you cleaned it.
Restoring Dry, Rough, or Cracked Utensils
Restoration is the rescue tier, and it follows a fixed sequence: sand, clean, condition.
- Sand lightly. Use fine-grit sandpaper on rough or fuzzy areas. The goal is to knock down raised fibers, not remove material—keep the pressure gentle.
- Clean away the dust. Wipe or wash off all sanding residue and let the utensil dry completely. Oil applied over dust or dampness won't absorb properly.
- Condition deeply. Apply food-grade mineral oil or board cream, work it into the grain, and leave it to absorb fully. For badly dried-out utensils, a longer soak in mineral oil or board cream restores moisture.
For minor cracks, insert food-safe wood glue, sand gently once dry, and recondition with oil. How often you condition depends on your environment: Liam O'Rourke, general manager of Larch Wood Canada, notes that wood in a dry desert climate—or a constantly humidified house—needs conditioning more often than wood in a temperate one. The trigger is visual and tactile, as Osborne puts it: if the wood fibers look or feel dry, "that's when you should be oiling."
Maintain and Monitor for Lasting Utensils
The decision: regularly inspect wooden utensils for signs of dryness, roughness, stains, or odors, and apply the matching care method promptly—daily wash, deep clean, or restoration—before small problems become cracks. The measurable indicator is the wood's own state: appearance (no dullness or stains), texture (smooth, not rough), and smell (no lingering odors) should remain consistent with a well-maintained, hygienic utensil. Wirecutter's editors put the payoff plainly: well-hydrated spoons should last years, or even a lifetime. Check yours after each wash, condition every few weeks or whenever the fibers look dry, and retire anything that cracks deeply—that simple loop is the whole system.
Sources
- How to Clean Wooden Kitchen Spoons — Wirecutter: Reviews for the Real World
- How to actually get your old wooden utensils clean and looking brand new again — NBC News
- the Ultimate guide to wood utensil care — Earlywood
- How to Maintain Wooden Cooking Tools for Generations to Come — Eater